Archive for the VWBlog Category

Canadian Rockies Photo Contest

Posted in eBooks, Good News, Monthly Photo Contest, TCBlog, VWBlog on July 14, 2011 by Darwin

How to Photograph the Canadian Rockies Photo Contest

Contest runs from July 15 – September 30, 2011

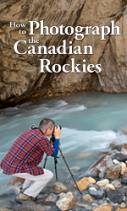
I am happy to announce a new photo contest to celebrate the glory of the Canadian Rockies and promote my new website How to Photograph the Canadian Rockies. Enter your best images of the Canadian Rockies. Any subject matter is acceptable (sports, wildlife, landscapes, macro, travel, or people) as long as the photo was taken within the Canadian Rockies (see this map for geographical boundaries of the Canadian Rockies). The contest is easy to enter and the prizes are great!

Prizes: The winning image will net the photographer a two night stay at eco-award winning Aurum Lodge, located 45 kilometres west of Nordegg, Alberta, Canada in the heart of the Bighorn Wildlands and situated overlooking Abraham Lake. The prize includes accommodations for one or two persons in a superior corner room and includes one evening meal, two breakfasts and taxes (value $400 CAD).

The winner also receives a 20-image personalized portfolio critique by me (Darwin Wiggett) presented as an interactive PDF (value $200 CAD).

To Enter: Simply go to How to Photograph the Canadian Rockies Flickr group, join the group and enter your favourite image taken in the Canadian Rockies. You may enter up to 10 images per week. If you are already part of the group, your images are automatically considered for the contest. Every Thursday I will pick my favourite entry from the Flickr group and post it on the How to Photograph the Canadian Rockies blog. The final winning image will be chosen from the weekly picks and awarded the prize on Thursday Oct. 6, 2011. Enter weekly, enter often – final deadline is September 30th at 11:59 MST.

Terms and Conditions: Only images of the Canadian Rockies are eligible (open to any photographer, anywhere in the world). All images must be the original work of the photographer. By posting on the How to Photograph the Canadian Rockies Flickr Group the photographer grants publication of images on the How To Photograph the Canadian Rockies blog. The photographer retains copyright and the only use granted by entering is posting of a weekly winner and the final winning image on the How to Photograph the Canadian Rockies blog. If you are already a member of the How to Photograph the Canadian Rockies Flickr group and do not wish your images to be eligible for the contest, you must withdraw your images from the Flickr group for the duration of the contest.

The prize of two nights’ accommodation to Aurum Lodge is available only during the off-season, from October 2011 to April, 2012, excluding public holidays.  Transportation to and from the Aurum Lodge is the responsibility of the winner.

Good luck!

©Darwin Wiggett - The deck at Aurum Lodge

The Weekly Photo – July 11, 2011

Posted in TCBlog, VWBlog, Weekly Photo with tags , , , , , , , , , , on July 11, 2011 by Darwin

The images below are of Abraham Lake in spring — looks inviting doesn’t it? Let’s go to the beach and go swimming. How about a canoe ride?

If you visit Abraham Lake in Alberta in May or June you’ll mostly see a baked mud flat. If you want big turquoise waters then come in September when the golden falls colours contrast well with the blue-green basin full of water. But in spring the cracked earth makes for some cool photos. Abraham has many faces from the ice bubbles of winter through mud-flats of spring to pristine-looking mountain lake in the late summer and fall.

©Darwin Wiggett

©Darwin Wiggett

©Darwin Wiggett

What’s in my F-Stop Bag? (a landscape photographer’s bag of goodies)

Posted in Camera Review, Filter, Good News, Instruction, Photography Gear, TCBlog, Videos, VWBlog with tags , , , , , , , , , , , , on July 5, 2011 by Darwin

Note: To see all future reviews please note this blog is no longer active, please visit me over at oopoomoo.com

One of the most common questions I get is about what gear I use and why. Of course, it does not matter too much about the gear. I get the same kind of photos whether I use my Canon G11, Canon Rebel or Canon 1ds Mark III; the only difference is in the quality of the files and the ergonomics and speed of the camera; the Mark III files can be enlarged to a greater size and is the fastest camera I own.

I have numerous other cameras and I use the one that offers the controls and features that I need based on what I want to shoot. I might use a Holga for mid-day ‘arty’ snaps in the city, the Canon Rebel for backpack trips, the Mark III for action, or a camera phone for everyday happy snaps. There is no perfect camera, just as long as you have one with you!

The same thing goes for camera bags and backpacks. I have numerous bags each one designed to do a different job. I use a different bag when I am biking, hiking or car touring. But over the last month or so I have standardized my  ‘landscape’ photo system into one bag that I am loving whether I use it for car-based shooting, short hikes or overnight back-country trips. My new bag of choice if the F-Stop Sartori EXP. This bag is the big gun of the F-Stop line and is touted as their ‘expedition bag’. For me it’s not too big but definitely can handle a lot of gear from my full landscape kit’ to everything I need for a couple of nights in the back-country.

What I like best about F-Stop bags is that they are convertible and you can put as much or as little camera gear in the packs as you need simply by swapping out the ICU’s (internal camera units). I use a small ICU for backpacking and take my Rebel and one or two lenses; the rest of the pack is filled with essential back-country camping gear. For everyday use I use a large ICU in the Sartori to hold my complete landscape photography kit with room left over for essential snacks, clothes and other useful items necessary for short hikes and messing around in nature close to the road.

If you want to see more neat features and other reviews of F-Stop bags check out these links: F-Stop Bags – High and Dry and Ben Horton’s Review.

For me F-stop bags are the most comfortable and well-designed packs for the active outdoor and nature photographer. I highly recommend them. The only complaint I have about F-stop packs are that they are designed for people with average to longish backs. Most women and shorter guys (under 5’6″) may find the shoulder straps and belt system too long to sit properly on the body. Samantha found this out the hard way when she tried to steal my F-Stop bag only to discover that even for a taller woman like her (5’7″) the strap system is too long. Sam also tried out a Loka and a Tipola pack and tested it on other woman and all the F-Stop packs had the same short-coming — the torso of the bag was too long for most women.

So… F-Stop needs to make some packs in smaller versions for the torsally challenged photographer! Or, at least make a series of packs with an adjustable harness. For me I am happy because all the F-stop bags fit me perfectly (and so I got to keep all the bags Sam tried to steal!). Seriously though,  if you are short or a woman I would hesitate at his point to order an F-Stop bag. But for all you average-backed and long-backed dudes, you’ll likely love this or any of the F-stop packs. For now this a guy’s dream outdoor and nature pack (the perfect purse for the rugged boy in us all!).

Note: F-stop is one of my sponsors; I get to tell it like it is and F-stop in no way influenced this review. I love the packs, Samantha wants to love them but they just don’t fit most women.

UPDATE: Good news, I just heard back from F-Stop and the good news is they plan to release a short torso version of the Loka pack this fall! Also the F-stop packs have really filled a niche and everyone loves them so supplies are a bit short at the moment because the bags sold even more briskly than anticipated!

To learn more about the Sartori Pack and to see every piece of camera gear I use for landscape photography watch the video below:

(warning, in the video I called my cable release a ‘polarizer’ — the mind is the first thing to go — always wear a helmet, the brain is a delicate organ!)

A list of the camera gear harmed in the making of this video:

Canon EOS-1ds Mark III

Canon 24mm TS-E Mark II

Canon 17mm TS-E

Canon 45mm TS-E

Canon 90mm TS-E

Sigma 120-400mm lens

Cokin Z-Pro Filter Holder

Singh-Ray Filters

The Lee Big Stopper

F-stop bags

If you are in the USA and buy from B+H Photo you are supporting this blog with tiny bits of coffee money (I might even buy an occasional beer on special days!). If you are in Canada please buy from The Camera Store simply because they are the best store in the country!

Darwin at the Columbia Icefield with an F-Stop Sartori EXP pack

The Weekly Photo – July 4, 2011

Posted in Art of Photography, Image Processing and Software, Instruction, TCBlog, VWBlog with tags , , , , , , , , , , , , , on July 4, 2011 by Darwin

The image below was taken on the Spring Photo Tour in the Canadian Rockies – this is of Abraham Lake from Windy point with a rain storm over Kiska Peak. I used a Canon 24mm TS-E lens tilted to give max apparent DOF. Lately I have been processing my colour images with the B+W conversion program Nik Silver Efex Pro 2. First I process the RAW image the way I want it to look in Camera RAW using Photoshop CS-5 (see original image in this post). Then I convert the image to a pleasing B+W using Silver Efex watching carefully to get the tones in the image exactly the way I want them. I layer the original processed colour image over the converted Silver Efex B+W image in Photoshop and then change the blending mode of the colour layer to “Color”. The result is an image with the contrast of the processed B+W but with the colours of the original file. Remember you can get 15% off of Silver Efex using my name for the discount code at checkout  – darwin (not darren!). In a future post I will have a step-by-step ‘recipe’ of how to make funky colour images using Silver Efex Pro 2. Of course, some people will prefer the original, some will like the conversion – but knowing how to use the tools given to you, you’ll be able to produce images that please your eye (and in the end that is all that matters).

©Darwin Wiggett - Silver Efex Pro 2 conversion

©Darwin Wiggett - original colour image

Lee Holder vs Cokin Z-Pro Holder

Posted in Filter, Photography Gear, TCBlog, Techniques, Videos, VWBlog with tags , , , , , , , , , , , , on June 28, 2011 by Darwin

Note: To see all future reviews please note this blog is no longer active, please visit me over at oopoomoo.com

If you have a full frame camera and plan to use and combine filters for your photography then you’ll likely want a filter holder. The two primary options are:

The Lee Holder – available in the USA at B+H photo and in Canada from The Camera Store

The Cokin Z-Pro Holder – available in the USA at B+H photo and in Canada from The Camera Store

To learn which holder I think is more practical watch this video:

Now the only problem is that the future of Cokin filters is up in the air – there may or may not be new product made, so buy your Cokin holders while you can just in case… and even if you don’t use them someone out there will want to buy your filter holders.

For more on filters see these links:

Essential Filters for Digital Nature Photography

Advanced Filters for Digital Nature Photography

©Darwin Wiggett - no filters

©Darwin Wiggett - Singh-Ray LB Warming Poalrizer and Singh-Ray 2-stop hard-edge grad filter

The Weekly Photo – June 27

Posted in TCBlog, Techniques, VWBlog, Weekly Photo with tags , , , , , , , , on June 27, 2011 by Darwin

Below is a photo from the Spring in the Rockies Photo Tour. This ‘secret spot’ is only 5-minutes from the Aurum Lodge. I used a Canon 24mm TS-E lens on my Canon EOS-1ds Mark III. The camera was in portrait orientation and I made two vertical photos; one shifted up, the other shifted down to make a long thin pano that I stitched using Photo Merge in Adobe Photoshop CS-5. I also had the lenses tilted for max apparent DOF. Exposure was 20s at f11. I also used a Singh-Ray 4-stop solid ND filter to lengthen exposure time to build-up colour in the sunrise.

©Darwin Wiggett

Fabulous Film Fridays – June 24

Posted in Fabulous Film Fridays, Image Processing and Software, VWBlog, Workshops and Seminars with tags , , , , , , , , , , , , , , , , , , , , , on June 24, 2011 by Darwin

The three images below were all taken with Gail, my Fuji GA645 point-n-shoot medium format camera using Fujicolor NPS 160 negative film. All photos were handheld and were taken on a recent tour of the Brazeau Collieries in Nordegg.

Speaking of Nordegg, I am happy to announce a brand new tour based out of Aurum Lodge on August 19-22, 2011 where we will have special photographer’s access to the old mine at Nordegg and we’ll be going on a photographer’s ice walk on the Athabasca Glacier in Jasper National Park. As well you’ll be accompanied by some really great photographers, Royce Howland, Mark and Leslie Degner, Alan Ernst and Samantha and me. To learn more about the unique photo tour in the Canadian Rockies see the PDF – click on this link.

©Darwin Wiggett

©Darwin Wiggett

©Darwin Wiggett

The last image above was converted to a tones black-n-white using Nik Silver Efex 2 which I use for all of my B+W conversion. If you are interested in any NIK software be sure to save 15% with the coupon code DARWIN

Photo of the Week – June 19, 2011

Posted in Art of Photography, Filter, Instruction, Photography Gear, TCBlog, Techniques, VWBlog, Weekly Photo on June 20, 2011 by Darwin

This image is from the recent spring photo tour in the Canadian Rockies. We we lucky to get great light one morning at Upper Waterfowl Lake in Banff National Park. Here I used my Canon 24mm TS-E lens tilted so the plane of focus gave maximum sharpness. I used a Singh-Ray 2-stop hard-edge grad to hold back the brightness in the upper part of the scene. As well, I used a Lee Big Stopper 10-stop ND filter to give a long 233-second exposure at f9 to show motion in the clouds. To see a larger version click on the photo.


©Darwin Wiggett

The Weekly Photo – June 6 – Tilt Shift Magic

Posted in Art of Photography, Articles about Photography, eBooks, Good News, Image Processing and Software, Instruction, Photography Gear, TCBlog, Techniques, VWBlog, Workshops and Seminars with tags , , , , , , , , , , , , , , , on June 6, 2011 by Darwin

©Darwin Wiggett

The photo above was taken on the Spring Photo Tour in the Canadian Rockies. I shot this image at sunset at the Kootenay Plains Reflecting Pools (my unofficial name for the place – click on the photo to see it larger). I used a Canon 24mm Tilt-Shift lens for three distinct advantages:


First, I used the shift feature to correct the perspective in the scene. With a normal 24mm lens the camera would be pointed down to take in the foreground deer skeleton and the trees in the background would distort and look like they are falling into the frame – yech! With the shift feature on the 24 TS-E lens, I simply leveled the camera back so that it was parallel to the trees and then shifted the lens down to take in the deer skeleton. The result are straight trees in the background with no distortion.

Second,  I  also used the shift feature to give me a wider field of view than a 24mm lens can give. In a single frame I could just get the skeleton and the tops of the mountain in the scene, nothing more. I wanted more sky than the 24mm lens could take in, so I shifted the lens up and took a second photo which was easily merged into a wider rectangle using Photo Merge in Photoshop CS5.

Finally, I used the tilt feature for enhanced depth-of-field. With tilt I got everything sharply focused from near to far by tilting into the plane of focus (see scheimpflug rule). Tilt can give you depth-of-filed from inches from the lens to infinity – very cool!

If you don’t know the advantages and creative power of Tilt Shift lenses for landscape photography and if you want to try out and learn how to use Tilt Shift lenses (Canon or Nikon) then be sure to come out to a seminar and field workshop by Samantha and I entitled: The Tilt-Shift Lens Advantage for Outdoor and Nature Photographers where we will demystify these powerful tools and show how they can be used in an easy to understand way. This hands on session is limited to 15 spots and we’ll have lenses on hand or bring your own lenses. The session is held in Calgary, June 11 1-4PM – see this link or email seminars@thecamerastore.com or call 403-234-9935 for more information.

Speaking of Samantha, she has just published an article for those unsure of using Social Media in photography – To Tweet or not to Tweet – check it out to see if you are a tweeter or not. So far I haven’t taken the plunge into the the twittery world….

And those of you who are fans of eBooks and like to promote the ones you find useful to friends and colleagues we are happy to announce that both Visual Wilderness (VW) and How to Photograph the Canadian Rockies (HTPTCR) websites now offer affiliate programs so that you get a percentage of any referrals you make. Help us spread the word and get paid and buy new camera goodies!

VW Affliate Program

HTPTCR Affliate Program

Finally, Here is one more sample of how to use the shift feature on Tilt Shift lenses to create megapixel wide scenes:

I took these three photos below with the lens shifted up, in the center position and then shifted down. In Photoshop all three images overlapped perfectly and Photo Merge in Photoshop CS5 aligned them perfectly into the final image (the fourth one below – from the Kootenay Plains Reflecting Pool – click to see the photo larger).

Lens shifted up

Center image - no shift

Lens shifted down

Final Image

The Weekly Photo and Two New eBook Releases

Posted in Books about Photography, eBooks, Good News, TCBlog, Techniques, VWBlog, Weekly Photo with tags , , , , , , , , , , , , , , , , on May 30, 2011 by Darwin

Below is an image taken during the spring of 2008 at the Columbia Icefields in Jasper National Park that I finally got around to processing.  Yikes, gotta get caught up!

The cool thing is that the longer I wait to process images the more likely I am to delete most of the photos from the shoot. After several years, my objectivity about the images is much higher and I realize that most of the photos I make actually suck! Only those images that are a tad different or say something that I haven’t said before are likely to survive the ‘aged’ editing process.

The image below was one of the few survivors. I took this image with my Canon EOS-1ds Mark III and a Canon 24mm TS-E lens (the original version). I liked the grungy look and enhanced that look by converting the image to a textured black-n-white (and then toned blue) with Silver Efex Pro 2. Any one interested in buying this software (which I am a huge fan of) can get 15% off if you use the code darwin on checkout.

©Darwin Wiggett

Speaking of the parks and the mountains and melting glaciers… I am happy to announce two new eBook releases. I have just released my latest eBook over at How to Photograph the Canadian Rockies. This latest book is a big compendium of all the great places to go in Banff National Park – check it out! You’ll need this eBook if you plan a visit to Banff National Park because it directs you to all the best spots in the the right light and in the correct season (over 50 locations are discussed).

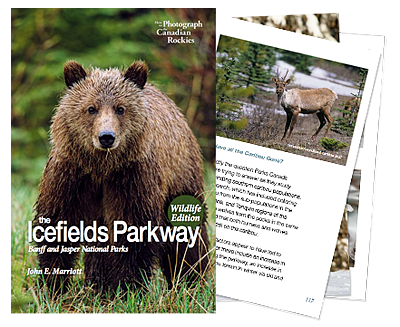
And if that isn’t exciting news, then this is; my good friend and Canada’s best wildlife photographer, John Marriott has  written an eBook for all of us Canadian Rockies fans. Check out The Icefields Parkway: Wildlife Edition

Here is more good news. I am offering a 20% discount on these $10 eBooks if you buy 2 or more eBooks by June 7 (midnight MST). Just use the code LLTL on checkout. This is the last time you’ll get this big of a discount. Going forward the standard discount will be 10% but only if you buy 5 or more eBooks.

And finally, if you want to share images you have taken in the Canadian Rockies, be sure to post them to the How to Photograph the Canadian Rockies Flickr group. Why bother? Well, I will be there to comment on your photos and also I will pick out a great photo once a week to feature on the How to Photograph the Canadian Rockies website!

Finally thanks to Stephen Desroches for his amazing hard work designing these eBooks and building the website and of course thanks to Samantha for her great editing job and moron (oops… I mean moral) support. Happy shooting!